
Good morning! Welcome to all. I hope that you are enjoying this lovely Saturday so far. In recent news, Andy and I put the security deposit down on our new apartment (YAY!) and discovered the beauty of a slow cooker. Why we did not realize it before, who knows… But we made some delicious Moroccan Lentil and Chickpea Soup last night and it was yum to the max (and gluten free/vegetarian/vegan as well)!
Anyhoo, for today’s crafternoon, we are going to revisit and revamp the Holiday Branch Decor we made over the holidays. We will reuse it to create a “Lovely” Branch Decor, perfect for the month of love (said with an entirely cheesy voice). So go ahead and take those Christmas ornaments off (if you haven’t already), leaving the strings you used still attached to the branch (here’s to reusing and recycling!). If you did not have the chance to make it or if you threw your branch away already, no worries at all! You will simply be starting from scratch on this one.

“Lovely” Branch Decor
What You Will Need (everyone):

- Watercolor paint, water and brushes
- Scissors
- Heart stencil (optional)
- Pencil
- 3 x Pieces of watercolor paper
What You Will Need (if starting from scratch):
- 1 x Tree Branch – I used one about 4 ft (122 cm) long, 1.5 in (4 cm) wide
- 5 x Long pieces of twine or string – I used hemp string about 3 ft (92 cm) long
The Process:
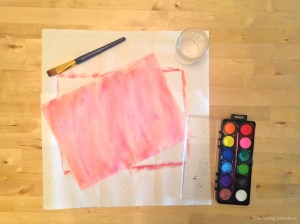
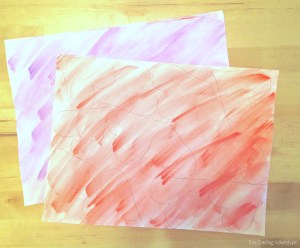
1. Using your watercolor paint, water and brushes, paint one side of the watercolor paper. I used a combination of red, pink and purple along with various strokes and techniques to create a more “textured” look. When paint has dried to the touch, paint the other side of the watercolor paper.
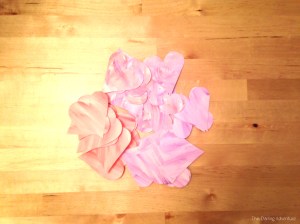
2. When paint is dried completely on both sides, use the heart stencil and pencil to draw hearts on the painted watercolor paper. I fit about 12 hearts onto each page.
3. Cut the hearts out.
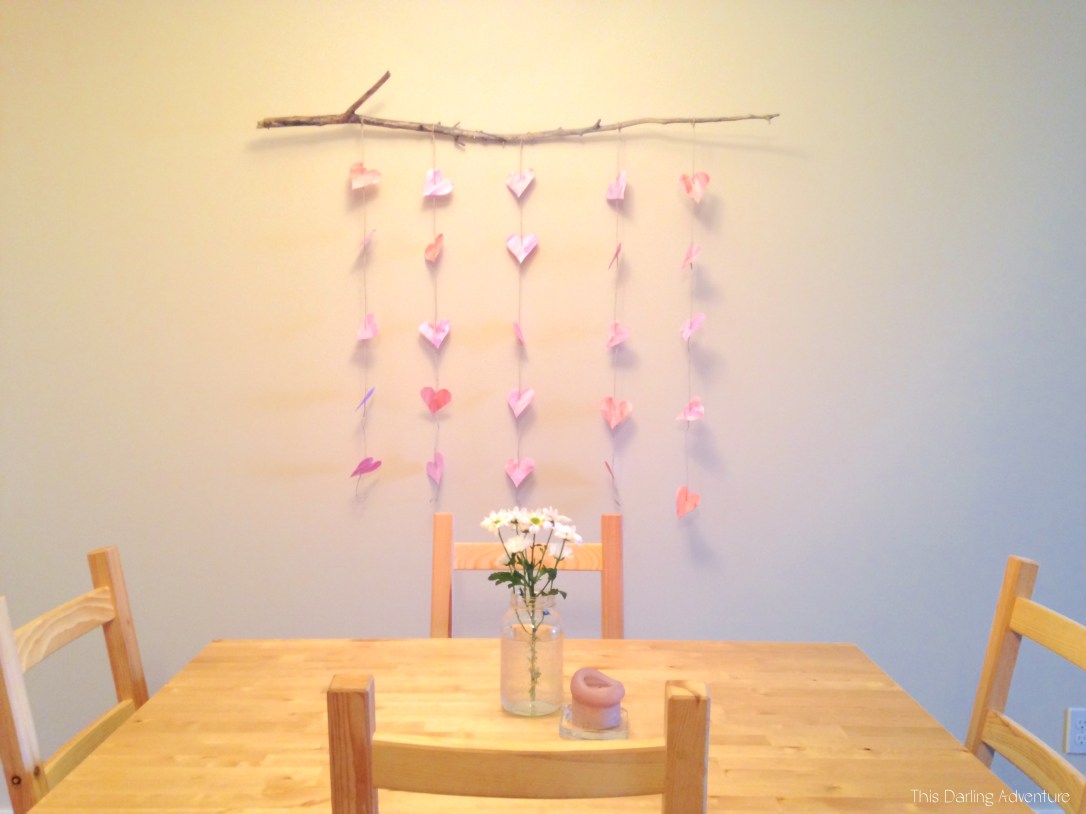
4. If you are starting from scratch, tie each piece of twine or string to the tree branch about 7 in (18 cm) apart using a simple, but sturdy knot.
5. Attach the hearts to each string about 7 in (18 cm) apart (about 5 hearts total on each string). I cut a small horizontal slit in the middle of each heart and simply slid the string through. You can also use tape, glue or staples to attach the hearts, though.
6. Finally, mount the tree branch back onto the wall and enjoy! (For guidelines on how to mount the branch, please refer to the Holiday Branch Decor post)
The Result:
I hope that you have enjoyed this fun (and super easy) Saturday Crafternoon! As always, if you have any questions at all, please do not hesitate to ask. And, if you decide to tackle this project yourself, post a picture of your finished product! I would absolutely love to see it! Remember, make it your own!
Well, that is all for now. Have a beautiful weekend, friends! 🙂

Oh this is SO pretty and whimsical! I’m going to try this although maybe not on a branch since its winter time here and everything is wet, ugh. 🙂
LikeLiked by 1 person
Hey, thanks! Definitely try it out! 🙂 Oooo… wet branches are a no go, but if you let it dry out for a couple days it should be okay. I think mine was slightly wet when I got it, but then a couple days inside did it some good. Best of luck either way! You got this! 🙂
LikeLike
That is so damn cute! I’ll try this too although maybe not with hearts… Maybe with silver and gold stars! Congratulations on putting down the deposit for your apartment! That’s so exciting!
LikeLiked by 1 person
Ooooo I love that idea! Go for it! And thank you 🙂
LikeLiked by 1 person
Congrats on the new place! When do you move?
LikeLiked by 1 person
Thanks so much! We will move at the end of the month! 🙂
LikeLike
Awesome, us too. I’ll have to remember to wish you a swift and stress free transition!
LikeLiked by 1 person
Wow, that’ll be awesome! I’ll have to remember to wish you guys one as well. We are just moving across town so it won’t be far at all… Maybe 10 minutes away 🙂
LikeLike
Love it!
LikeLiked by 1 person
Thank you! 🙂
LikeLike
I love this!!! So pretty
LikeLiked by 1 person
Hi there, thanks so much! 🙂
LikeLiked by 1 person
This is gorgeous 🙂
LikeLiked by 1 person
Thank you! 🙂
LikeLike
That’s really creative! And congrats on the deposit!
LikeLiked by 1 person
Hey, thanks! And super easy 😉 thank you so much!
LikeLiked by 1 person
Very pretty!
LikeLiked by 1 person
Thanks so much! 😊
LikeLike