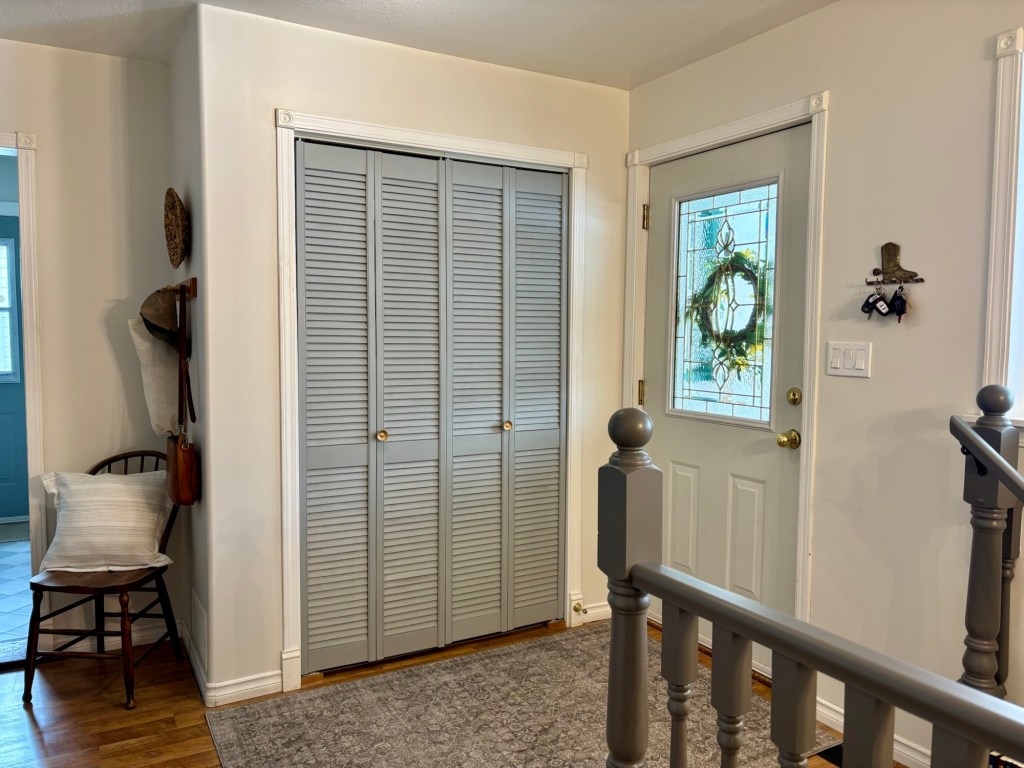
One of the most underrated, yet most utilized parts of our home is the coat closet by our back door. It is where daily life happens – where all good adventures begin. It witnesses our comings and goings as we gear up for the day ahead and drop everything upon returning home. It is the work horse of our home and an integral part of our daily rhythms of life.
Yet for the past three years, this coat closet has driven Andy and I crazy.
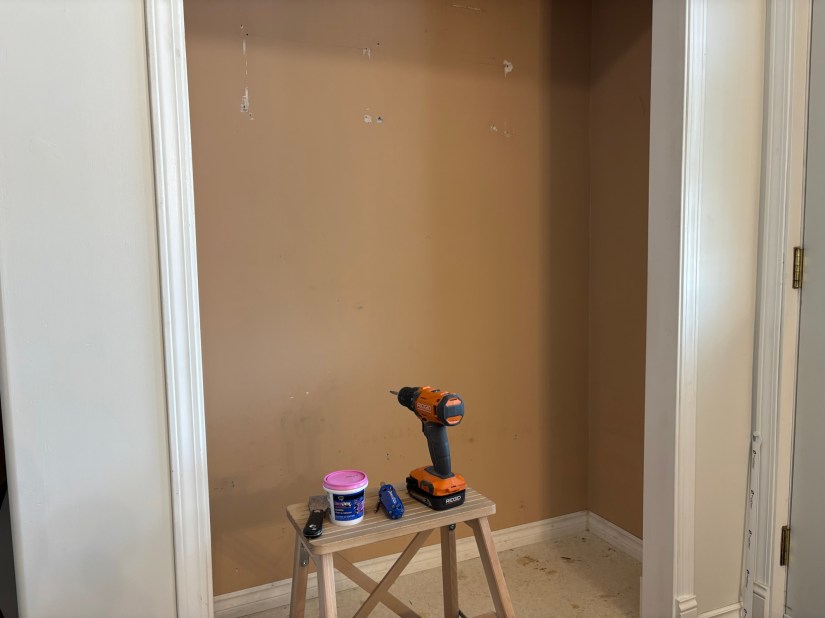
Now to be fair, its not the closet’s fault. It is a good closet, well-located near the back entrance of our home with ample room inside. At one point it even had a wire shoe shelf, which housed our footwear and was well-loved and appreciated. But when said shoe shelf collapsed one day leaving gaping holes in the drywall because it was not secured to the studs, we knew a closet refresh was in the near future.
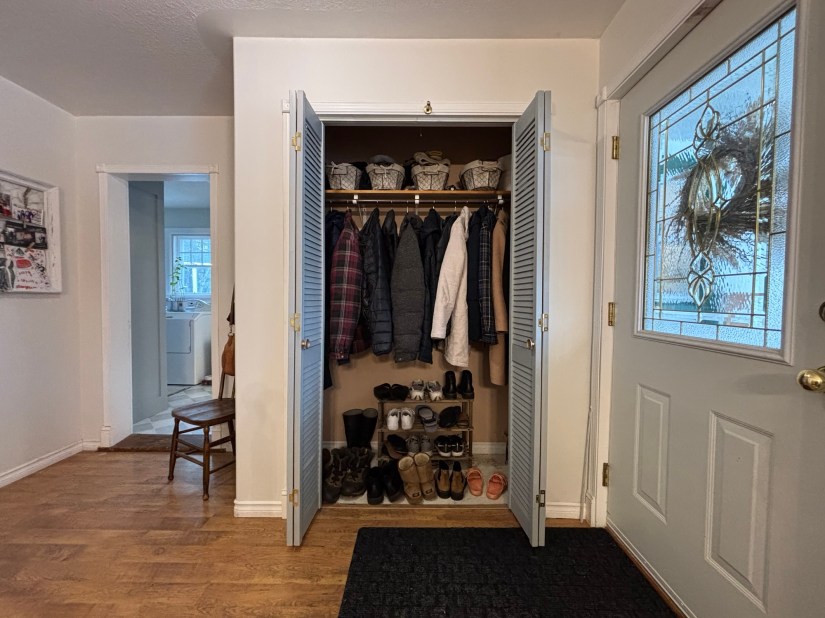
Our biggest frustration with the closet was not its lack of storage potential, but rather the muddled mess of shoes, toques and gloves that greeted us every time we opened its bi-fold doors. The temporary shoe shelf we placed in the closet was not wide or tall enough to accommodate any of Andy’s shoes. And the baskets for our toques and gloves were nowhere near large enough to be practical, causing an avalanche of winter attire to spill out onto our heads every time we pulled them off the top shelf.
So we got to work and came up with a plan for our coat closet that would be both practical and, of course, aesthetically pleasing.
We first cleared everything out of the closet, including the existing closet rod, shelf and brackets. We then patched all the holes in the drywall.
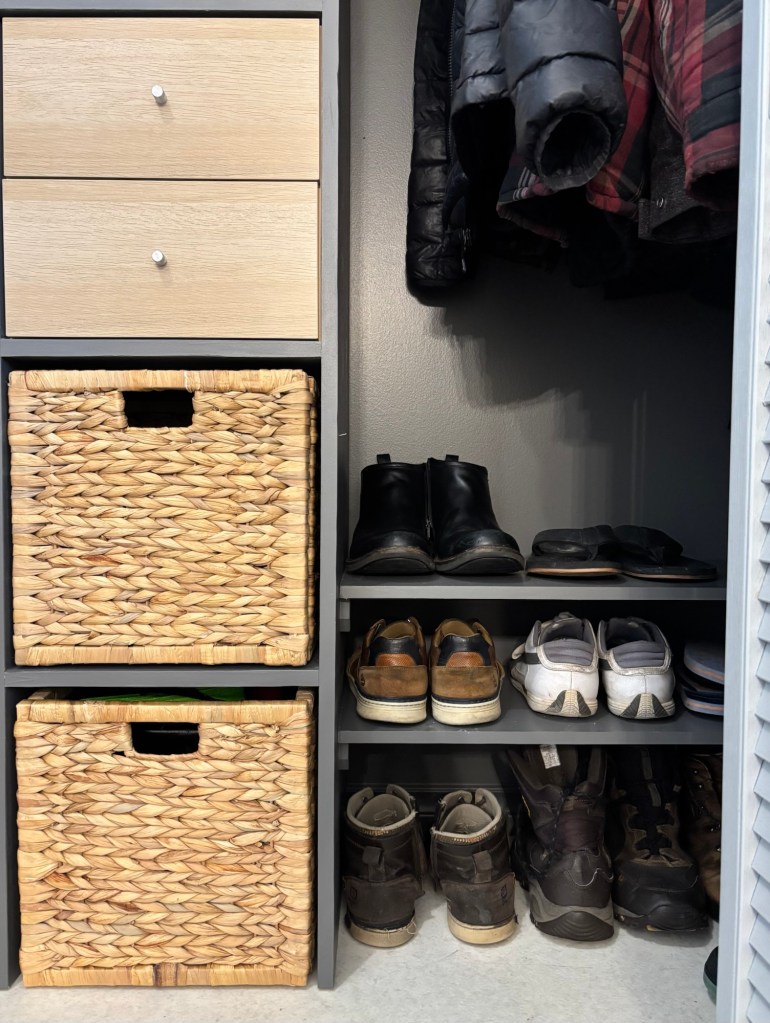
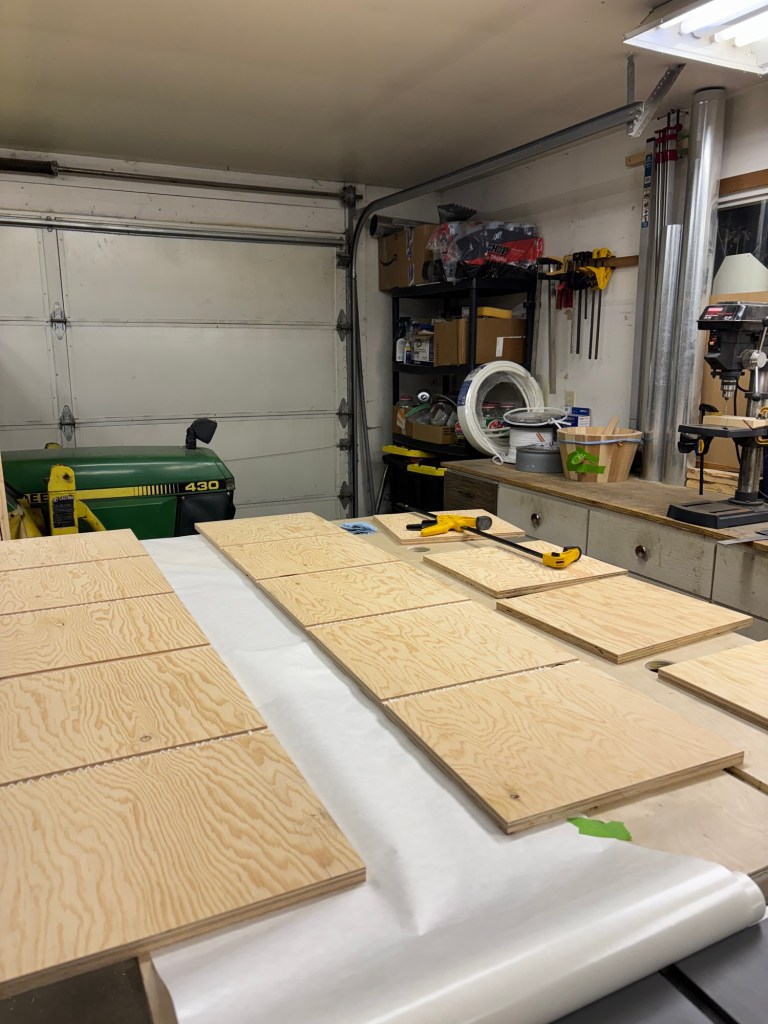
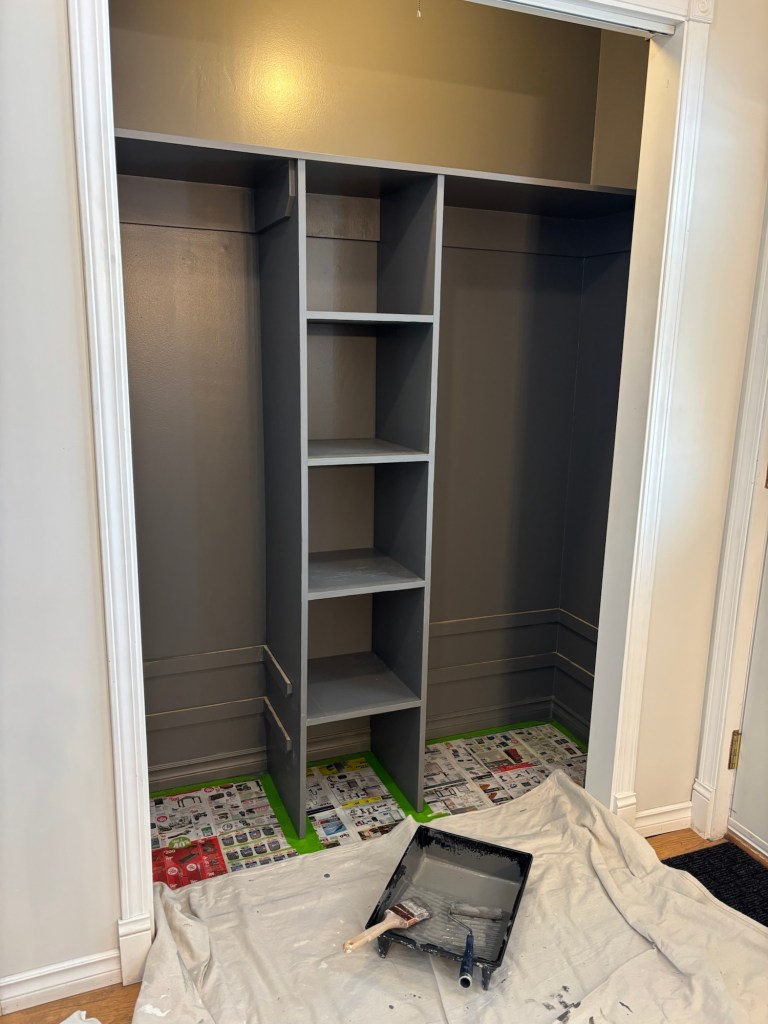
While the patches were drying, we cut 3/4″ plywood to size to create a shelving tower for the closet. We decided to base the the size of the shelving tower on the dimensions of IKEA’s KALLAX shelf unit so that we could easily use its accessories and inserts for organization.
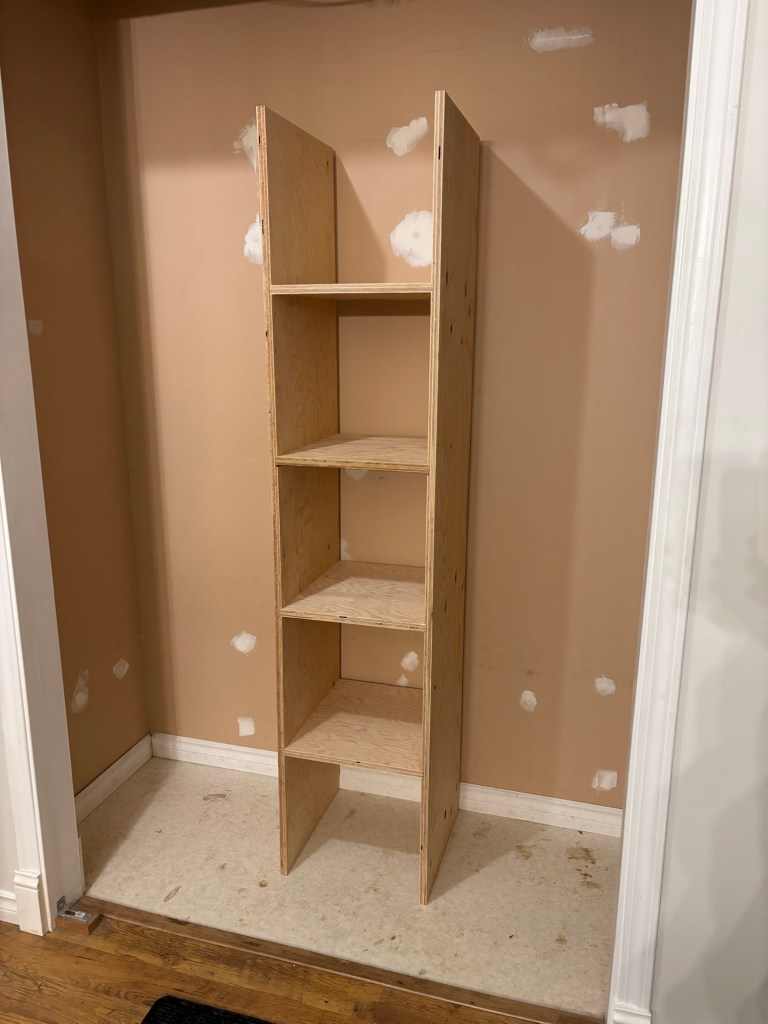
After a quick dry fit of the shelf, it was time to start painting. We had some paint leftover from our hallway refresh and decided to paint the closet walls and trim Benjamin Moore’s Kendall Charcoal, applying two coats to each.
We also applied edge banding to the exposed edges of the shelving tower and primed the entire unit so that it was ready for installation and paint. To install the shelving tower, we set the tower in place, ensured it was level and screwed the cleat we had installed at the top of the tower into a stud in the back wall.
We then cut and installed MDF cleats for all the shelves required as well as cut and installed the top shelf. We screwed the cleats for the top shelf into the studs to ensure they would be secure when the closet rods were installed, as they would need to be able to hold up the weight of jackets and coats. We also cut the shoe shelves to size, but left them uninstalled to make them easier to paint.
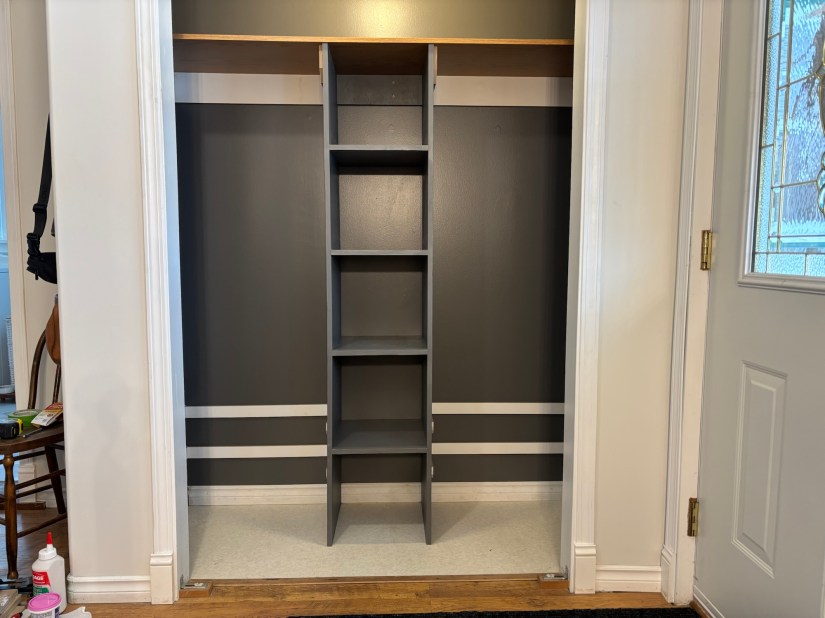
After installing the cleats and top shelf, we filled all the nail and screw holes, sanded everything down and painted the cleats, shelf and shelving tower with two coats of paint. We also painted the shoe shelves, installing them once they were dry.
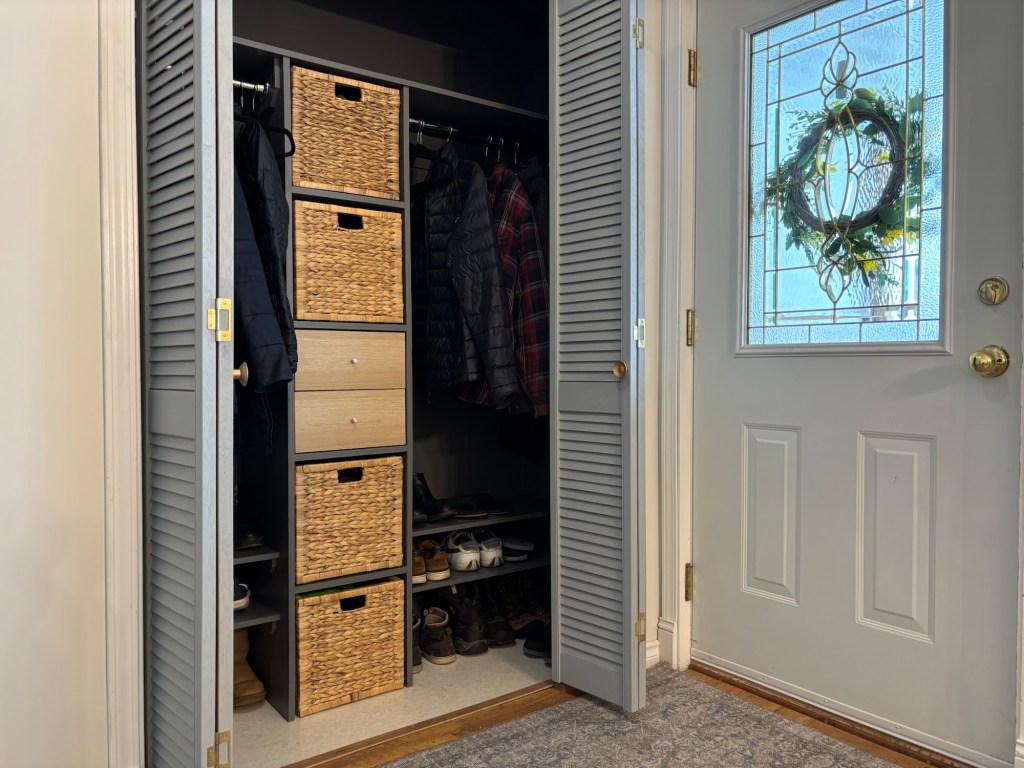
And then came the fun part. We cut the closet rods to length and installed them using these closet rod brackets. We also assembled and installed this KALLAX 2-Drawer Insert and four of these LABBSAL Baskets to help us organize our toques, mitts, and other daily essentials.
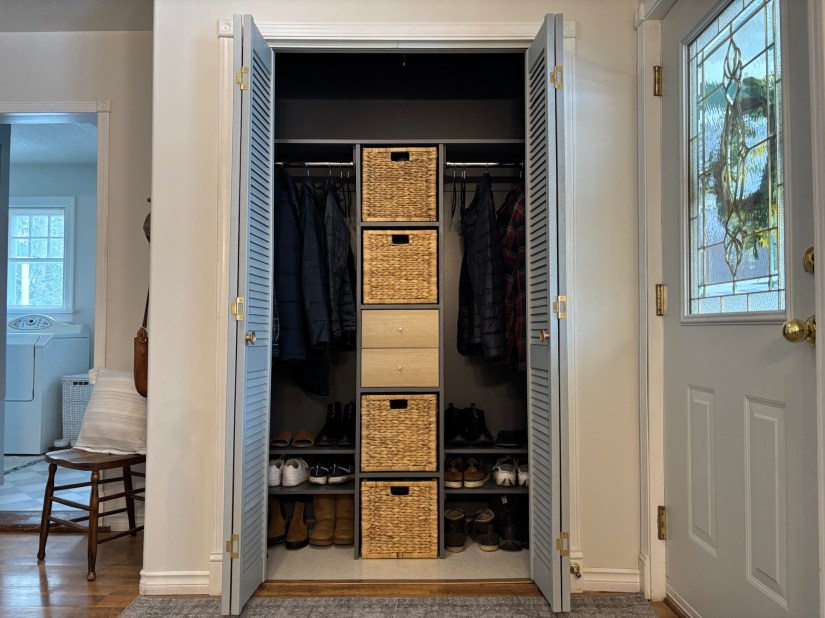
Overall, we are so pleased with how this coat closet turned out. Gone are the days of mitten avalanches and shoe explosions. The baskets are more than large enough to accommodate our winter attire and all of our shoes have a home. And the best part? We still have plenty of hanging space for jackets and coats. It is a small refresh that has certainly made a big difference in our daily rhythms, bringing order to chaos and beauty to an otherwise overlooked part of our home.